Sewing An Easy Coat-Fabrics from GStreetfabrics.com
We are going to make a simpler jacket using this pattern step by step so you can easily make one, too

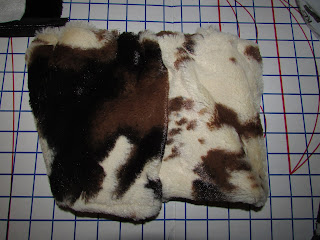
The first time was improvised on this pattern, using leftover fur. Example below
We are going to follow the pattern by using the pattern pieces exactly and we are going to put side pockets instead of the front pockets.
The pockets can be turned inside out when you reverse the coat for use on the other side. This will be explained.
Example of how I used the pattern previously, But this time we will follow the pattern more exactly and it will be Black and Copper-reversible.
This is the second time I am using this pattern. The pieces are cut out. The first time I used it was when I took some leftover fur and guided the use of the pieces in a similar way to the picture on the pattern.

Side 2

This was Jacket 2 and I put right sides together and made a seam from the bottom edge a little off center and left an opening just big enough after sewing around to flip the jacket inside and then had a reversible jacket.
I made the scarf first and then leftovers were sewn together to make the jackets-there were still leftovers so I took an old purse apart that was wornout and reused the circle rings and the zippers to make a matching purse


side 2
still leftovers... Fingerless gloves-2 squares sewn together with holes at the end to put my fingers through
Note: I don't like to be cold...


There is still enough scraps to make one of these to go in the purse.
This time I will be using a combination of suede backed sherpa in black and Copper Stretch Lame. The pieces are cut out. I just have to sew the pieces together. Fabric came from
1. cut out your pieces-in this case, I cut out the full pieces from the black suede sherpa and the color block pieces from the stretch copper lame pleather. I then top stitched the colorblock pleather pieces onto the appropriate pieces before I did the actual sewing. This would have been much simpler and quick without the colorblocking-but I love this copper pleather. Both of these fabrics came from G Street Fabrics.


This is a picture of the same sleeve just the two different sides.
Remember I make all my coats reversible.
My error: I should have adjusted the sleeves for the size of my arm muscles. First of all this is a coat sleeve, so many times you will have on a long sleeve garment under it. Also, I have very big arms. I was a pro bowler from the age of 7. My arm muscles were very advanced and as I got older and they loosened my arms were bigger than my size. I have been kayaking in the past 10 years which helps, but then along came covid... and I did not like to go kayaking in my ususal places because they became crowded when people didn't have to go to work. I used to go mid week on my days off so I could float along and paddle on a beautiful private like lake...Ha, now everyone has experienced the outdoors, so it has become crowded.
So, I may have to remake my sleeves to accommodate my arm width. I am contemplating this as I write this blog.

Side 1 of Jacket pieces. I have topstitched a trim on the edge where the pleather is on top of the sherpa. Where the seam is black I opened the seam and topstitched it open for the effect you will see better on the sewn sleeve. Everything was an experiment as I was doing the jacket. The collar is pinned on-to see which side I should attach for the best affect. As you can see I decided the collar and lapels should be the same color when opened.

Side 2 of Jacket when reversed. I decided it needed something more. I laid out some trims... that was where the mid piece trim came from - also from G Street Fabrics and then I decided it needed edging and of course... I succumbed to the button wall at G Street.

Here is sleeve one sewn together and also trim has been topstitched where the edge of the lame needed something at midway.

These is the same sleeve opposite side.
The sleeves will be shortened after they are attached to the Jacket so the length is correct. I added length to the pattern piece, in case I liked the bottom turned up in a cuff.

It looks cute, but I think I will option for bias trim in black.

I think the end of the sleeves and the edge of the jacket will all look better with the bias tape trim.

I found these great copper buttons on the button wall-so I splurged. I think putting a button hole on the lapel and then adding a button to each side and both sides of the jacket will be designer like...Ha

Side 2 will have round copper buttons and again on the lapel.
Placing Collar on the Jacket
3. Test place your collar on the jacket to see how it is going to look...color to color, texture to texture
The Lame Stretch Pleather can be purchased on the tubes at GStreet at the end shelving next to the Linings Dept at the top of the ramp into apparel wear to the left. There are colors also. This is heavy enough for a jacket and light enough for layering on something else.
So here we go. I need to get a new camera for the pics as my old nice camera was around my neck when I went into the brink on my new water toy last week.

We will have a blog session on making your water play outfit
Future Blog: Capris + tank + coverup+1 piece suit
This should be easier-as the pieces with the sherpa on suede are already reversible.
Step by Step making this coat
1. We have a piece of Black Suede Sherpa and we cut all the pieces of the jacket -View D, except for the front pockets.
I used a side pocket piece that I use over and over again, because it is big enough for me to put my hands in and pose to the side...LOL
When cutting out side pockets-that means they are sewn into the side seam of the garment by sewing to a front and back piece.
There is going to be a front piece of Black Sherpa suede and a back piece of Copper pleather, so we will be able to sew a pocket into the side seam. If you were just using the suede sherpa you would just top stitch the edge of the pocket so that you do not have a wide seam when you are finished at the pocket.
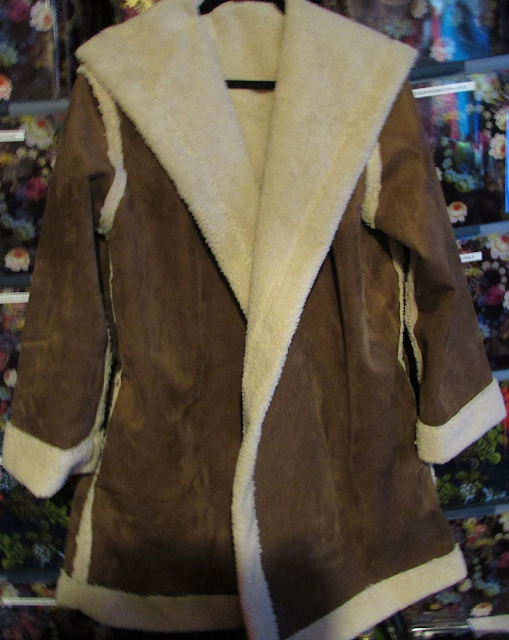
As in this coat which I made out of Suede Sherpa. It is reversible to all sherpa as I top stitched the edge of the side pocket so it matched the reversing side.

First I will sew the sleeves together and then I will sew the body pieces together and 3. I will attach the sleeves.
The sleeves are cut out of the black suede sherpa and then with the Sherpa side out the tops of the sleeve have copper lame pieced on top before the sleeve is sewn together. This will make one side of the jacket all suede sherpa with copper accents on the top of the sleeve and on the top of the front and back jacket pieces. This is done by topstitching the copper lame piece on. On the other side of the sleeve piece copper lame will be on the bottom of the sleeve and the black suede will be on the top of the sleeve. In cutting it out all pieces in black and then copper pieces to topstitch on before sewing the sleeve pieces together and the Jacket pieces.
This should be fairly quick and I will be able to wear the jacket tomorrow. It is a bit chilly, so this should be perfect.


Comments
Post a Comment